
Blogs & News
2022 Business Central new features round up
12 December 2022

Summary
As we close out this year and look forward to next, we thought we’d give you a round up of the exciting new features in Business Central from 2022, that we think you should be making use of.
Top Business Central new features
Account Schedules are now financial reports
- Screens have been refreshed to make using and amending more logical.

- You can now run the report by just clicking on the Report Name.
- However, if you want to change Column Headings whilst inside the report you need to click on Edit Financials Report.

- To amend rows within the report, you now click on Edit Row Definition.

- Don’t forget you can check if you have any GL codes that have missing GL Account Categories by opening the Fact box panel from the GL Account Categories page.
- The GL Account categories page also allows you to automatically update 3 basic Financials Reports: (Income Statement , Balance Sheet, Retained Earnings).
Bank Feeds
There are two brand new options for connecting your bank directly to Business Central for statements and from Business Central, directly to your bank for Payments:
- Continia Payment Management
- Yavrio
This means no more csv files!
The above options provide slightly different features. For more information, you can contact the GCC Business Central sales team.
OCR for Continia expenses
Continia expense management now has a built in OCR function for expenses:
- Smartscan will read the expense receipt and try to fill in the information for the expense user automatically directly from the receipt.
- This is for use on the Continia Expense mobile app.
Let’s have a look at this in action.
1. The first step is to save the image of the receipt to be used.
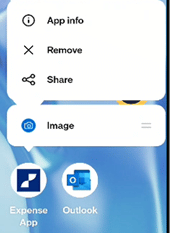
TIP: Right clicking on the Expense App on your phone, and then the Image icon, will enable you to quickly take a photo of the receipt, and save it inside Continia.
2. When you are ready to create your expense, either at the end of the day, or the end of the week, simply create a new expense.
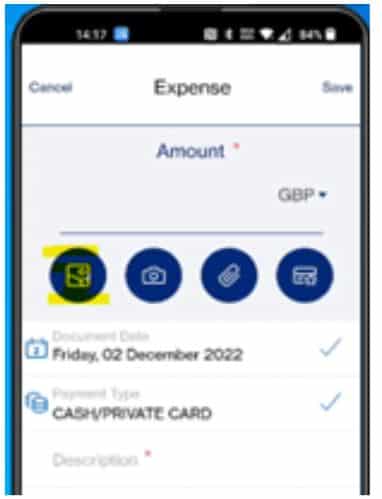
3. Inside the new blank expense entry click on the Image Icon (highlighted in yellow above).
This will show all the receipts that you have taken photos of, that have not yet been linked to a saved expense.
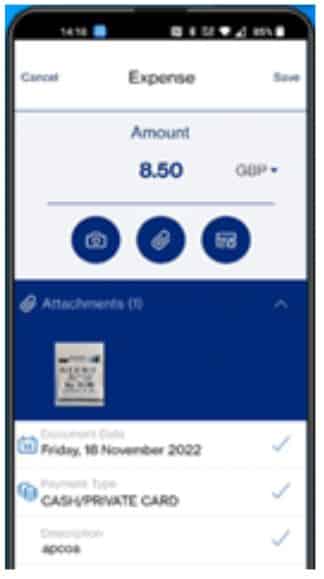
4. Once you have selected the correct Image, SmartScan will try and automatically fill in the details.
You can change details, such as the Amount, Date and Description to match the details on the receipt, as illustrated in the image below.
5. Before saving the expense, fill in the remaining mandatory fields that your company requires for expenses, for example the Expense Type.
6. Expense users just need to check and make sure the details are correct, amend the fields that need more details and then Save. You can then move onto the next expense.
NOTE: This functionality is in its early days so will continually be getting better at recognising and auto filing of data.
Further Information
If you have any questions about this or need assistance, then please contact the GCC Group Support Team on 0345 260 1151 or servicedesk@gccgroup.co.uk